
Firehose Project Week 11
Finally, the jQuery actually makes more sense now. I have spent this week reading up on it and finished a couple of courses as well. One on Pluralsight and another one here (update: it is offline now, so try this instead). The latter is very practical as it basically asks you to do something with jQuery and gives you 300 seconds to figure out how to do it. Each task makes you google, come back and try your solution, repeat if not working.
The End is Close
As I am getting quite close to the completion of the Firehose Project, I started the Job Preparation section already. It has lots of new algorithm challenges and useful tips on how to write the CV, which questions to ask on the interview and which ones to be ready to answer.
Also, it has lots of useful theory topics on data structures which are highly likely to be brought up during the interview. My mentor also said that Juniors get asked these questions a lot. For instance, “What is a Linked List and why is it useful?”.
At this stage, I am mainly reading up on theory and starting making a checklist of things that I will have to have ready before applying for jobs. Generally speaking, Tutorials Point is my go-to website whenI need to read up or get familiar with any particular language or framework.
Single Table Inheritance and Chess
The group project is of course on the go, so it takes up quite a lot of time as well. There are no tutorials to follow so we as a team are pretty much on our own. Of course, we are having a spec for our Chess application and some supplemental materials are getting sent to us every week as we have to tackle new areas of our app.
This week it was paramount for all of us to understand the Single Table Inheritance (STI) and how to implement it. It is quite a big concept and single blog post is not enough to go through all the details. Moreover, there have been a series of blog posts written already and there is a useful RailsCasts video on the subject. I would highly recommend going through them if you are interested in the details. I will cover here just the high-level concept.
As the name suggest inheritance is the central idea here. If you are not sure what Inheritance is - check this blog post before continuing.
Single Table refers to the database table. Effectively, we have a single Model that is the “parent” model for other models that inherit from it, but will be different from each other.
We also need the way to connect our “parent” table to its child models. So we will need to have a “type” column in our table that will just store the name of the child Model.
The result that we get is that every Child Model will have all the data that is declared in the Parent Table and no specific table of its own. The same goes for all the methods that will be written in the body of the Model - each Child Model will inherit all of them from Parent. Of course to make it work you will have to specify it in each Child Model manually, by adding:
Class Child < Parent
  #class body
end
A perfect example which can illustrate STI in action is a Chess game. If you have never played chess - have a look at Wikipedia article, but don’t stop there - I urge you to play it. It is known as “the game of the Kings” and rightfully so as the game board is similar to the battlefield with two generals fighting each other. Highly strategic game which will make you think really hard.
Now that you are familiar with the Chess, it has lots of Pieces, but they are all different, right? You have a King, Queen, Rooks, Bishops, Knights, and Pawns. Each of them has their own rules on how they can move and in which directions. Yet they all share properties of this Parent Model “Piece”. Here is code from our schema.rb file for the Piece Model:
create_table "pieces", force: :cascade do |t|
  t.string   "color"
  t.string   "type"
  t.integer  "x_position"
  t.integer  "y_position"
  t.integer  "game_id"
  t.integer  "player_id"
  t.boolean  "captured",   default: false
  t.boolean  "checkmate",  default: false
  t.datetime "created_at"
  t.datetime "updated_at"
  t.boolean  "moved",      default: false
end
As I mentioned, all these properties will be shared between all types of pieces.
Back to The Front-End
As in any team, we have tasks that are back-end and front-end. The aim of this group project is to get the taste of everything as much as you can. To start with I took some tickets on the front end and will carry on working on them for the next couple of weeks, moving to the back-end afterwards.
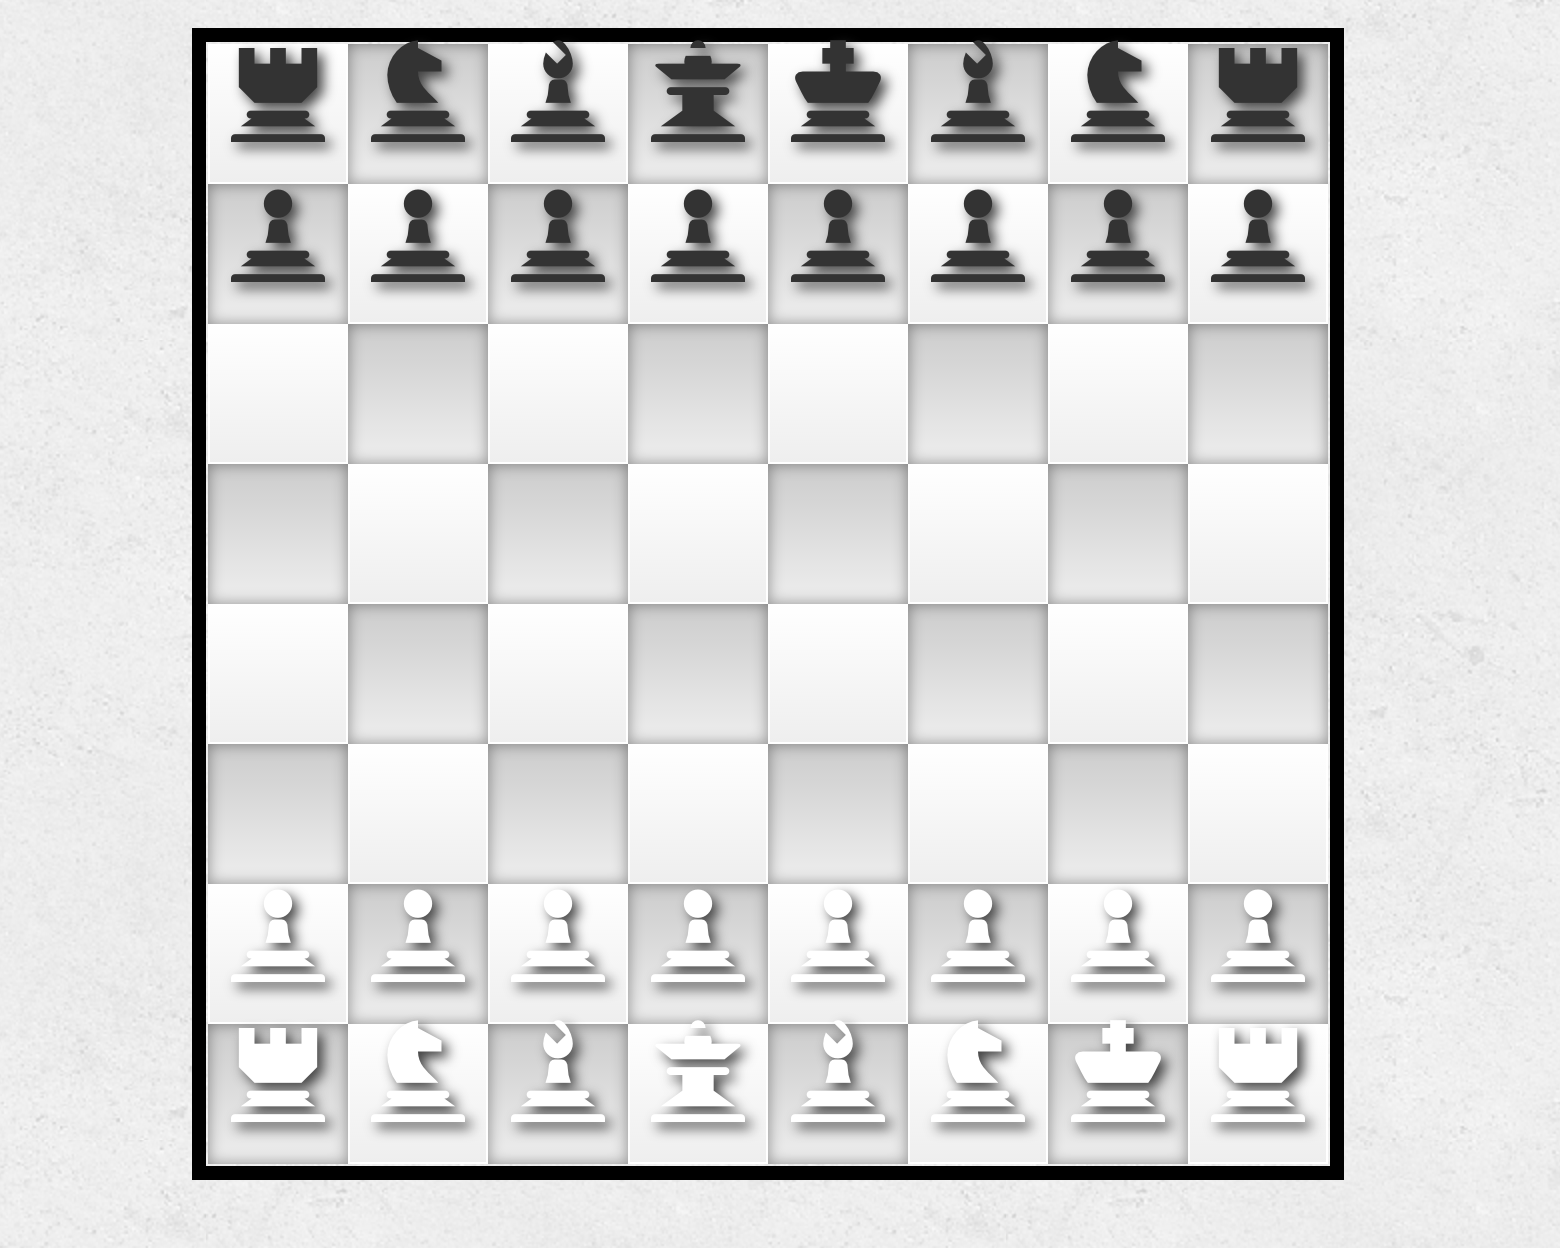
This week I have built the chessboard I drew all the pieces on it. We are using the Bootstrap framework so it has the chess Glyphicons are included as part of the package.
To start with I have built the whole thing in pure HTML using <table>, <tr>’s and <td>’s. It ended up looking like a lengthy file, so I had to refactor. jQuery proved to be helpful here, I have just used a loop and appended eight <td>’s to each row in the table. Here is the final code:
$(function() {
  for (var y = 0; y <= 7; y++) {
      $("#chess-board").append(
        "<tr>" +
          "<td data-x='0' data-y='" + y + "'></td>" +
          "<td data-x='1' data-y='" + y + "'></td>" +
          "<td data-x='2' data-y='" + y + "'></td>" +
          "<td data-x='3' data-y='" + y + "'></td>" +
          "<td data-x='4' data-y='" + y + "'></td>" +
          "<td data-x='5' data-y='" + y + "'></td>" +
          "<td data-x='6' data-y='" + y + "'></td>" +
          "<td data-x='7' data-y='" + y + "'></td>" +
        "</tr>");
  });
You might have noticed the data-x and data-y values (they have been added at a later stage). I will explain in the next post why they are there. At this moment they are out o the scope of this post.
Now that we are finally done with the HTML skeleton, it’s time for some CSS!
As much as it looks simple, it took some time to make the CSS code as short as possible. I thought how could I use SASS here and get more practice with it along the way. The mixins seemed like a reasonable choice combined with the CSS pseudo-classes :odd and :even (black and white cell logic). This is what I have ended up with:
Mixins for box shadow and gradient fill:
@mixin shadow-box($amount, $color) {
    box-shadow: inset 0 0 0 $amount $color;
    -moz-box-shadow: inset 0 0 0 $amount $color;
    -webkit-box-shadow:inset 0 0 0 $amount $color;
}

@mixin cell-gradient($from, $to) {
  background:#cecece;
  background:-moz-linear-gradient(top, $from, $to);
  background:-webkit-gradient(linear,0 0, 0 100%, from($from), to($to));
}
The rest of the CSS:
#chess-board {
  border: 7px solid #000;
  border-collapse: separate;
  padding: 1px;
}

#chess-board td {
  width: 70px;
  height: 70px;
  @include cell-gradient(#fff, #eee);
  @include shadow-box(1px, #fff);
  font-size: 47px;
  @extend .text-center
}

#chess-board tr:nth-child(odd) td:nth-child(even),
#chess-board tr:nth-child(even) td:nth-child(odd) {
  box-shadow:inset 0 0 10px rgba(0,0,0,.4);
  -moz-box-shadow:inset 0 0 10px rgba(0,0,0,.4);
  -webkit-box-shadow:inset 0 0 10px rgba(0,0,0,.4);
  @include cell-gradient(#ccc, #eee);
}
Looks quite neat and short and here is the result:
Little Time Savers
A little trick that I have discovered this week and which (OMG) actually saves so much time is the ability to run a program right in Sublime Text. Just execute the Cmd+B on a Mac when you are in the file and a small terminal window will appear at the bottom of Sublime. It will be always useful in a situation where you have just one method to test. For instance, when I am solving some challenges on Project Euler. I am constantly using it or when I try to make an isolated test of a specific method in my app. Before I used to copy the method in a new file, save it and then run it via Terminal. Now, I just open up the new file and start playing with the code.
Summary
It is still early days of the group project, but I can see the value already in it. Firstly, all of us have separate tasks to do that in one way or another intertwine with each other. We learn how to avoid that. Secondly, we are all pushing our code to GitHub, create the Pull Request and wait for the code reviews. Discussion starts, code gets refactored, before it is getting “thumbs up” and merged into the master branch.
The collaborative aspect of the team development and necessary git knowledge is already starting to feel more natural. Only that will be (I hope) a huge bonus when looking for our first position in real world.
Plus you get to work with cool people who are around the same coding level as you are, so it’s pretty fun!
Happy Coding!
My Journey at Firehose Project: 84.62%